Branching Story Paths
So, you want to write a story that has multiple paths? What would be your biggest obstacle is the scope itself. Before we proceed, here are some useful links that will help you out to understand how you could plan the structure and the amount of work it will involve:
It is important to understand that ultimately, it depends on you as a developer on how to structure and organize your CYOA game. This guide is merely a stepping stone to give you an idea how to implement them in a game.
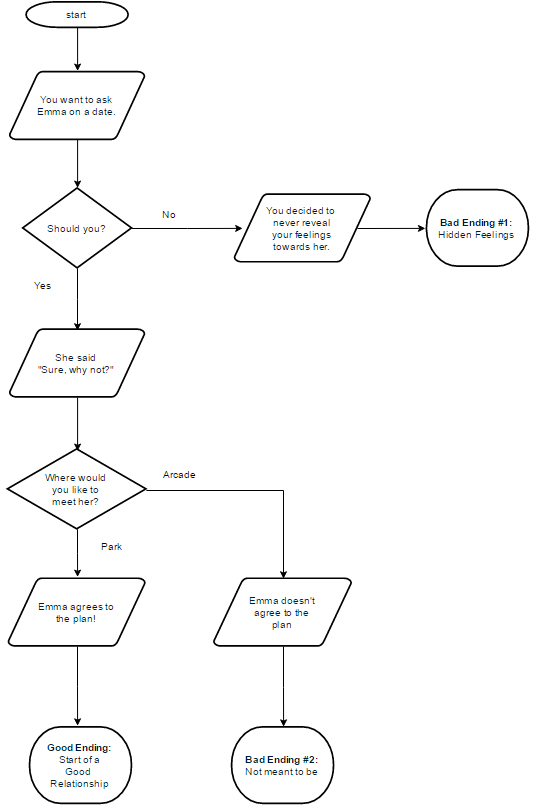
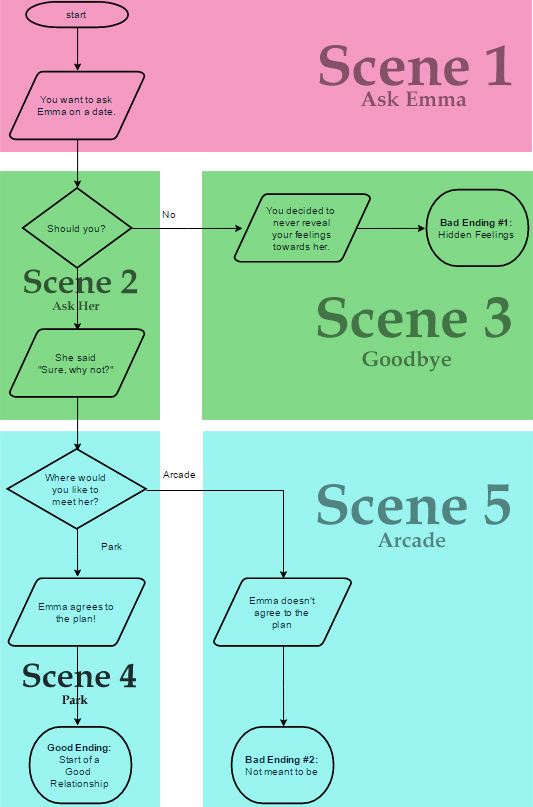
As usual, we will use a simple flowchart to give us a clear direction of our story.
As you may have noticed, this branching story is very simple. We do not need variables to determine stats or affection points. But it still shows a considerable amount of length and scenarios! The more requirements for a branching path or ending, the longer the flowchart will be. Which in turn means a larger scope and workload for your VN. For the sake of this tutorial, we won't be covering those. If you really want to add stats or affection points, you will only need to learn about Number Variables and/or use the Character's Parameters. And for the execution itself, just use Conditions.
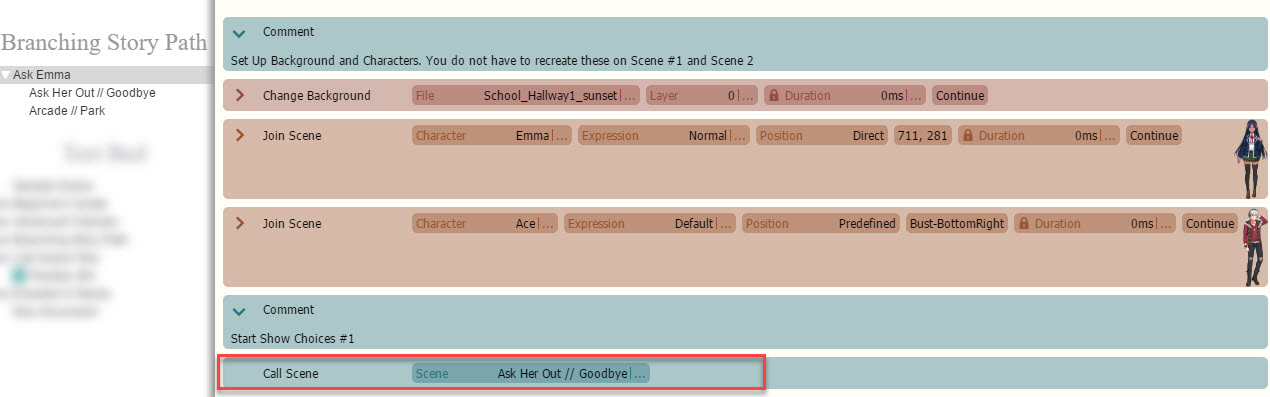
But as you may have noticed, this entire scenario occurs in 'one area' and the flow of events would have to be seamless. Instead of using Change Scene, we'll be using Call Scene. What it does is to avoid having to recreate the Change Background, Join Scene, etc. commands and instead, 'copy and paste' that called scene's commands over to the current scene. This will make the flow of the story seamless. Here are a few examples to implement the scene, the flavor texts are not included for the sake of clarity.
Implementation #1
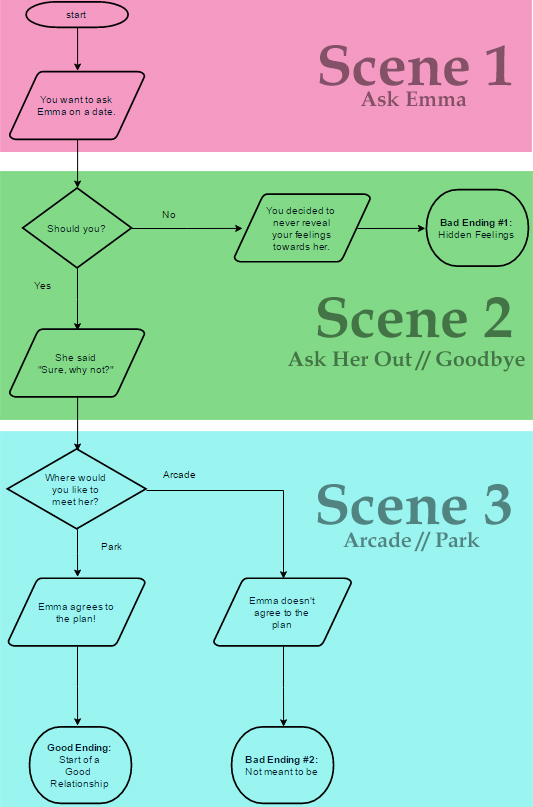
Because of the nature of this narrative, the Scene Content would be harder to debug with the amount of commands and choices. We will have to change how we do our scenes. In this case, the narrative can be separated into three sections:
The purpose of this layout is to make it easy to edit and debug. To implement in Visual Novel Maker, We would need to create three scenes, like this:
The First Scene, Ask Emma, contains the beginning portion of our story. This is where the groundwork, such as backgrounds music and so on, are set.
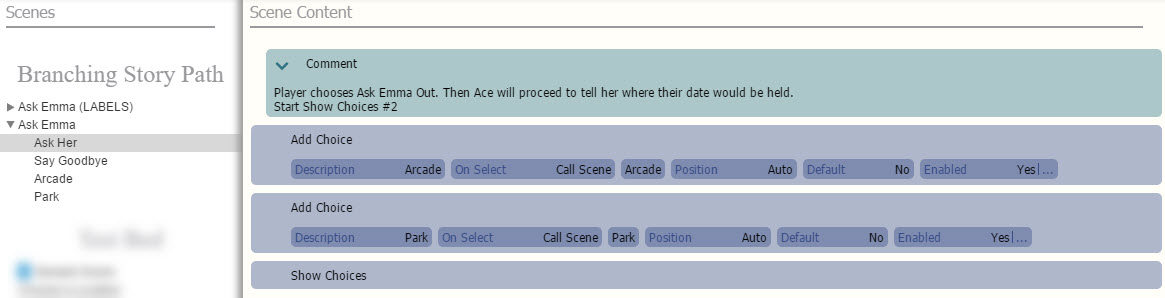
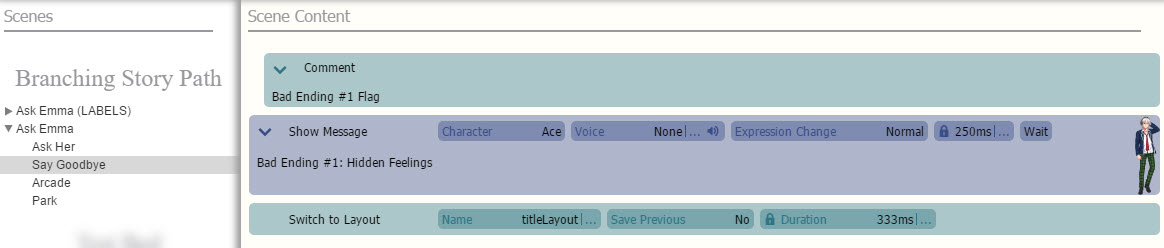
The Second Scene, Ask Her Out // Goodbye, contains the first set of choices; one of which leads to Bad Ending #1.
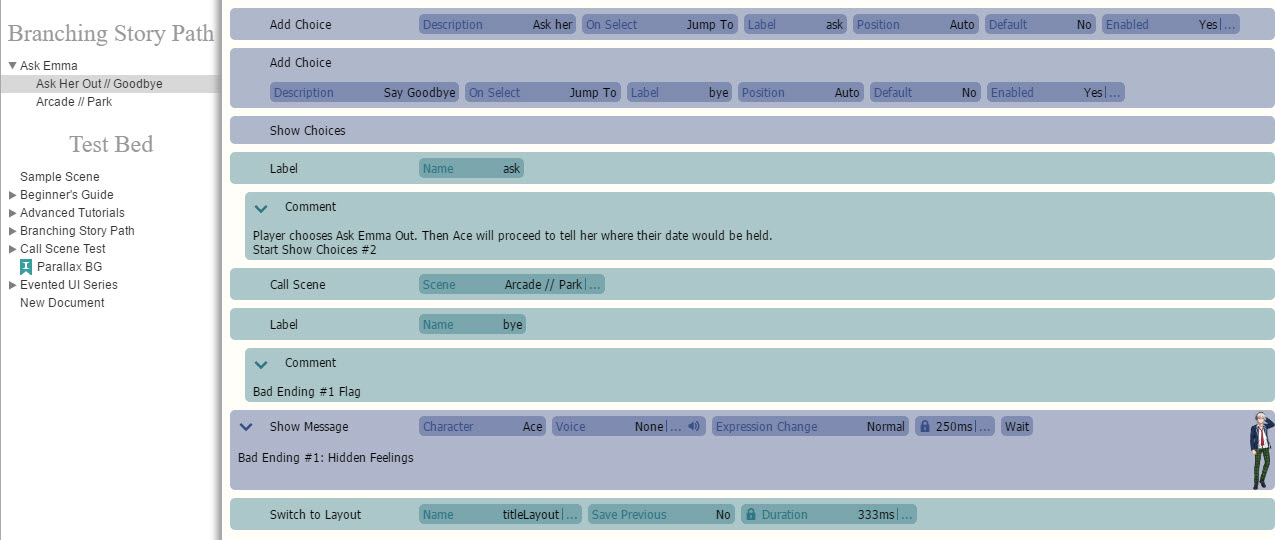
And finally the Third Scene, Arcade or Park, is another set of choices leading to a conclusion.
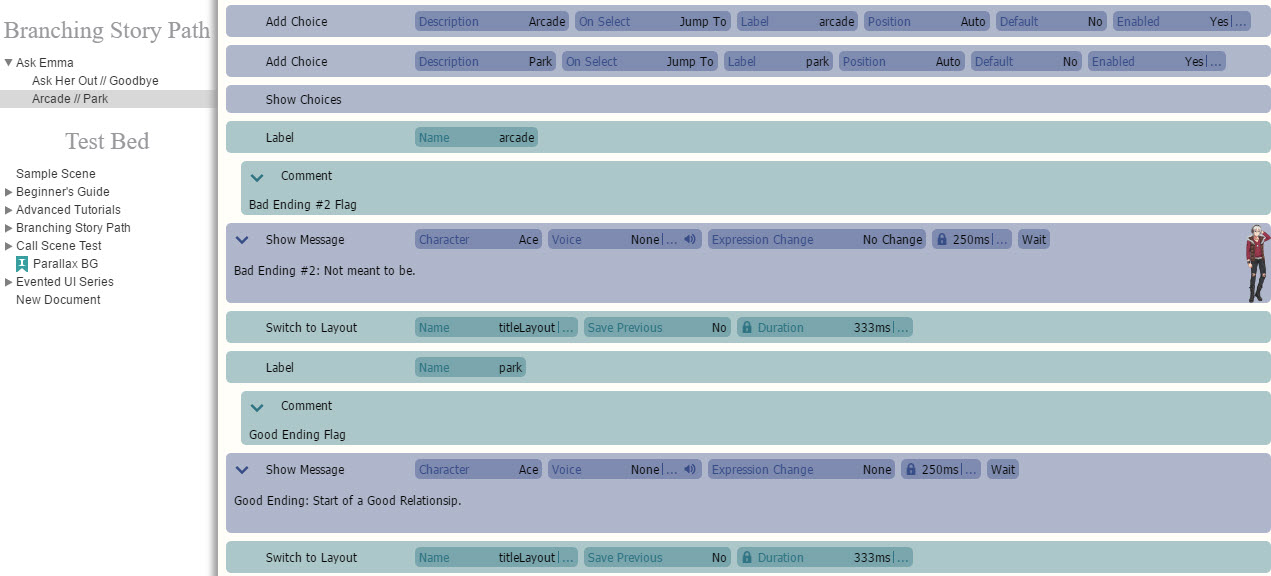
As you can see, if they were in a single scene, it would be confusing to keep track of all these labels. But this might be too 'dirty' for you. There is another way to execute this.
Implementation #2
Show Choices has its own Call Scene trigger. So dividing the scene will have a slight change:
Instead of making three scenes with the choices in them, each Scene is a result of a selected choice. So it would look like this:
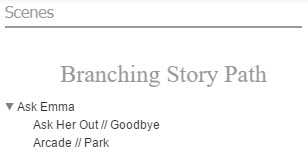
Scene 1: Ask Emma
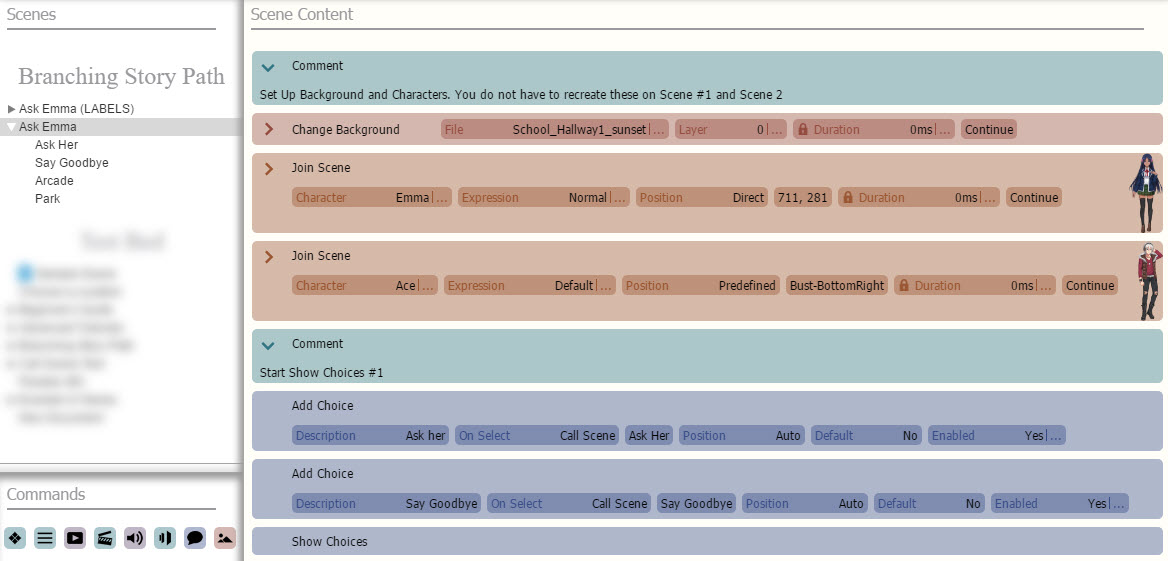
Scene 2: Ask Her
Scene 3: Say Goodbye
And so on. It would require more scenes but it will be easier to track of them as long as they're organized properly.
Either way works and there are more ways to implement it. It will come down to your preference as a developer. Hopefully, this has given you a solid idea on how Call Scene works!